


Do not Remove the Governor!
Introduction
Welcome to FRP, your go-to source for all things power sports! We’re passionate about sharing our love for mini bikes and making sure you have the best experience possible. Today, we’re diving into a hot topic: removing the governor from a gas mini bike. While this can boost your mini bike's performance, it's important to note that modifying your gas mini bike can void the warranty and might be illegal in some areas. Always check local laws and prioritize safety first!
Understanding the Governor
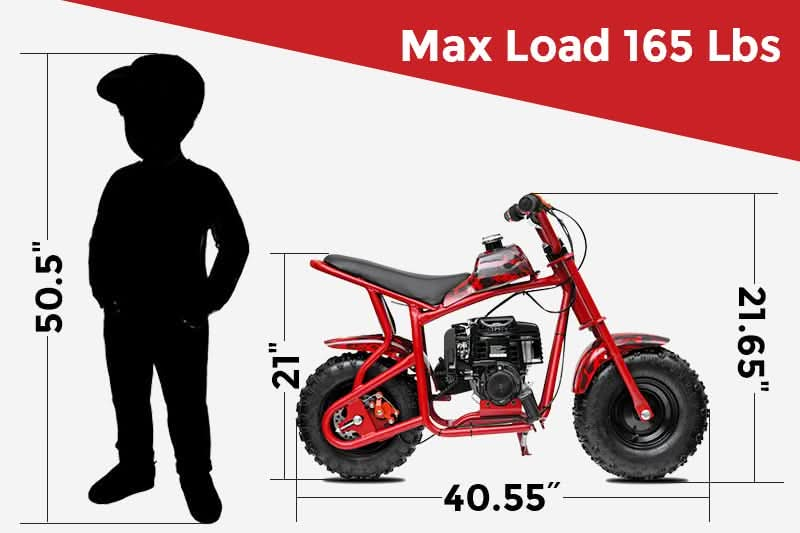
A governor is a device that limits the speed of your mini bike. It’s there to keep things safe, especially for younger riders. Most gas-powered mini bikes, like our GMB100 with its 99cc engine, come with a governor to prevent the engine from going too fast. While removing it can make your mini bike faster, it also comes with some risks.
Safety Considerations
Before you even think about removing the governor, let’s talk safety. Always wear protective gear like helmets, gloves, and pads. Make sure you’re working in a safe environment and have an adult supervise if you’re underage. Remember, removing the governor means your mini bike will go faster, so be prepared for a wilder ride!

Tools and Materials Needed
To remove the governor from your gas mini bike, you’ll need a few tools:
• Screwdrivers
• Pliers
• Wrenches
• Safety gear
Getting everything prepared in advance will streamline the process.
Step-by-Step Guide to Removing the Governor
Step 1: Preparing the Mini Bike
First, clean your mini bike and secure it in place. This makes it easier to work and prevents accidents.
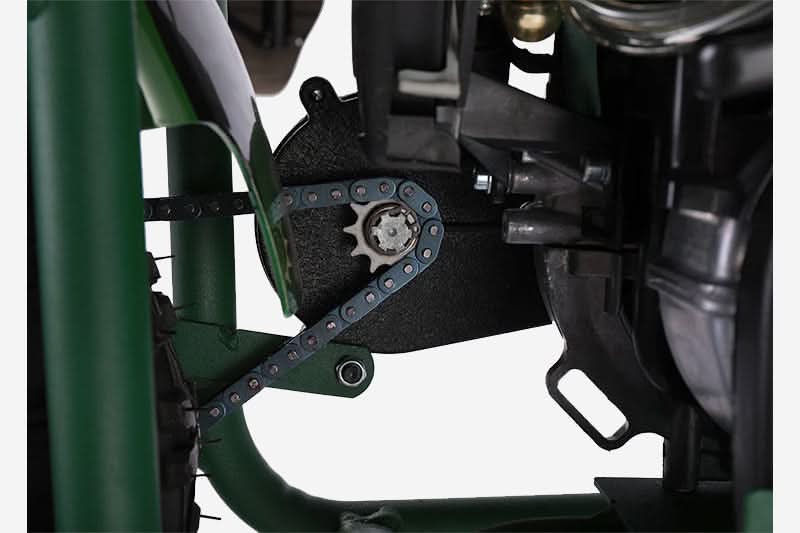
Step 2: Locating the Governor
The governor is usually located inside the engine or carburetor area. Consult your mini bike’s manual to find its exact location.
Step 3: Accessing the Governor
Remove any parts that block access to the governor. This might include the engine cover or other components.
Step 4: Disconnecting and Removing the Governor
Carefully disconnect and remove the governor. Take care not to harm any other components during this procedure.
Step 5: Reassembling the Mini Bike
Put everything back together, making sure all parts are secure and in their original place.
Step 6: Testing the Mini Bike
Finally, test your gas mini bike in a safe area to ensure everything is working correctly.
Post-Removal Adjustments
After removing the governor, you might need to adjust the throttle for optimal performance. Regularly check the engine and maintain your gas-powered mini bike to keep it running smoothly. This ensures a safer and more enjoyable ride.
Potential Risks and How to Mitigate Them
Removing the governor can increase the speed and power of your gas mini bike, which also raises the risk of accidents. Always ride in safe areas and wear protective gear. Make sure your gas-powered mini bike is in top condition to handle the increased performance.
Legal Considerations
Modifying your mini bike might be illegal in some places. Always check your local regulations before making any changes. Remember, safety and legality come first!
Conclusion
Removing the governor from your gas mini bike can boost performance and make for an exciting ride. However, it’s crucial to prioritize safety, follow legal guidelines, and understand the risks involved. We don’t recommend modifying your 99cc mini bike as it can void your warranty and pose safety risks. Always ride responsibly and enjoy the thrill that mini bikes offer!
Have you tried modifying your gas mini bike? For more tips and products, visit us at www.frpmoto.com
References